Credentials
Learn how to use the built-in Credentials Auth extension for Username/Password auth, user management, and account security features in your llms .py application
The built-in credentials extension enables Username/Password authentication for your Application, including a Sign In page, user registration, role assignment, and account locking.
It provides full user management through both the CLI and a web-based Admin UI, along with account self-service for all authenticated users.
Enable Credentials Auth
Credentials is the default Auth Provider (LLMS_AUTH=credentials) which is automatically enabled when at least one user has been created. If no users exist, the extension disables itself and the app runs as the default user without authentication.
Getting Started
Create your admin user from the CLI to enable authentication, the "admin" username automatically gets the Admin role:
llms --adduser admin
# Enter password when prompted

# Start server
llms --serve 8000
When you start the server, authentication will now be enabled since at least one user exists and you'll be presented with the Sign In page.
After logging in as admin, you can create additional users from the Manage Users page which can be accessed from the user menu.
UI Features
User Menu
After signing in, the user avatar dropdown shows:
- Username and My Account link
- Manage Users link (Admin only)
- Sign Out button
TIP
Admin role can access the Manage Users pageManage Users (Admin only)
Accessible at /admin for users with the Admin role. Provides a table of all
users showing:
| Column | Description |
|---|---|
| Username | Account name |
| Roles | Assigned roles (Admin badge highlighted) |
| Status | Active or Locked (with lock icon) |
| Created | Account creation date |
| Last Login | IP address and relative timestamp |
| Actions | Per-user action buttons |
Click Create User to create a new user account with password and optional Admin role.
Available actions per user:
- Change Password - Set a new password for any user (modal dialog)
- Lock - Suspend the account with confirmation (not available for admins or yourself)
- Unlock - Restore a locked account
- Delete - Permanently remove the account with confirmation (cannot delete yourself)
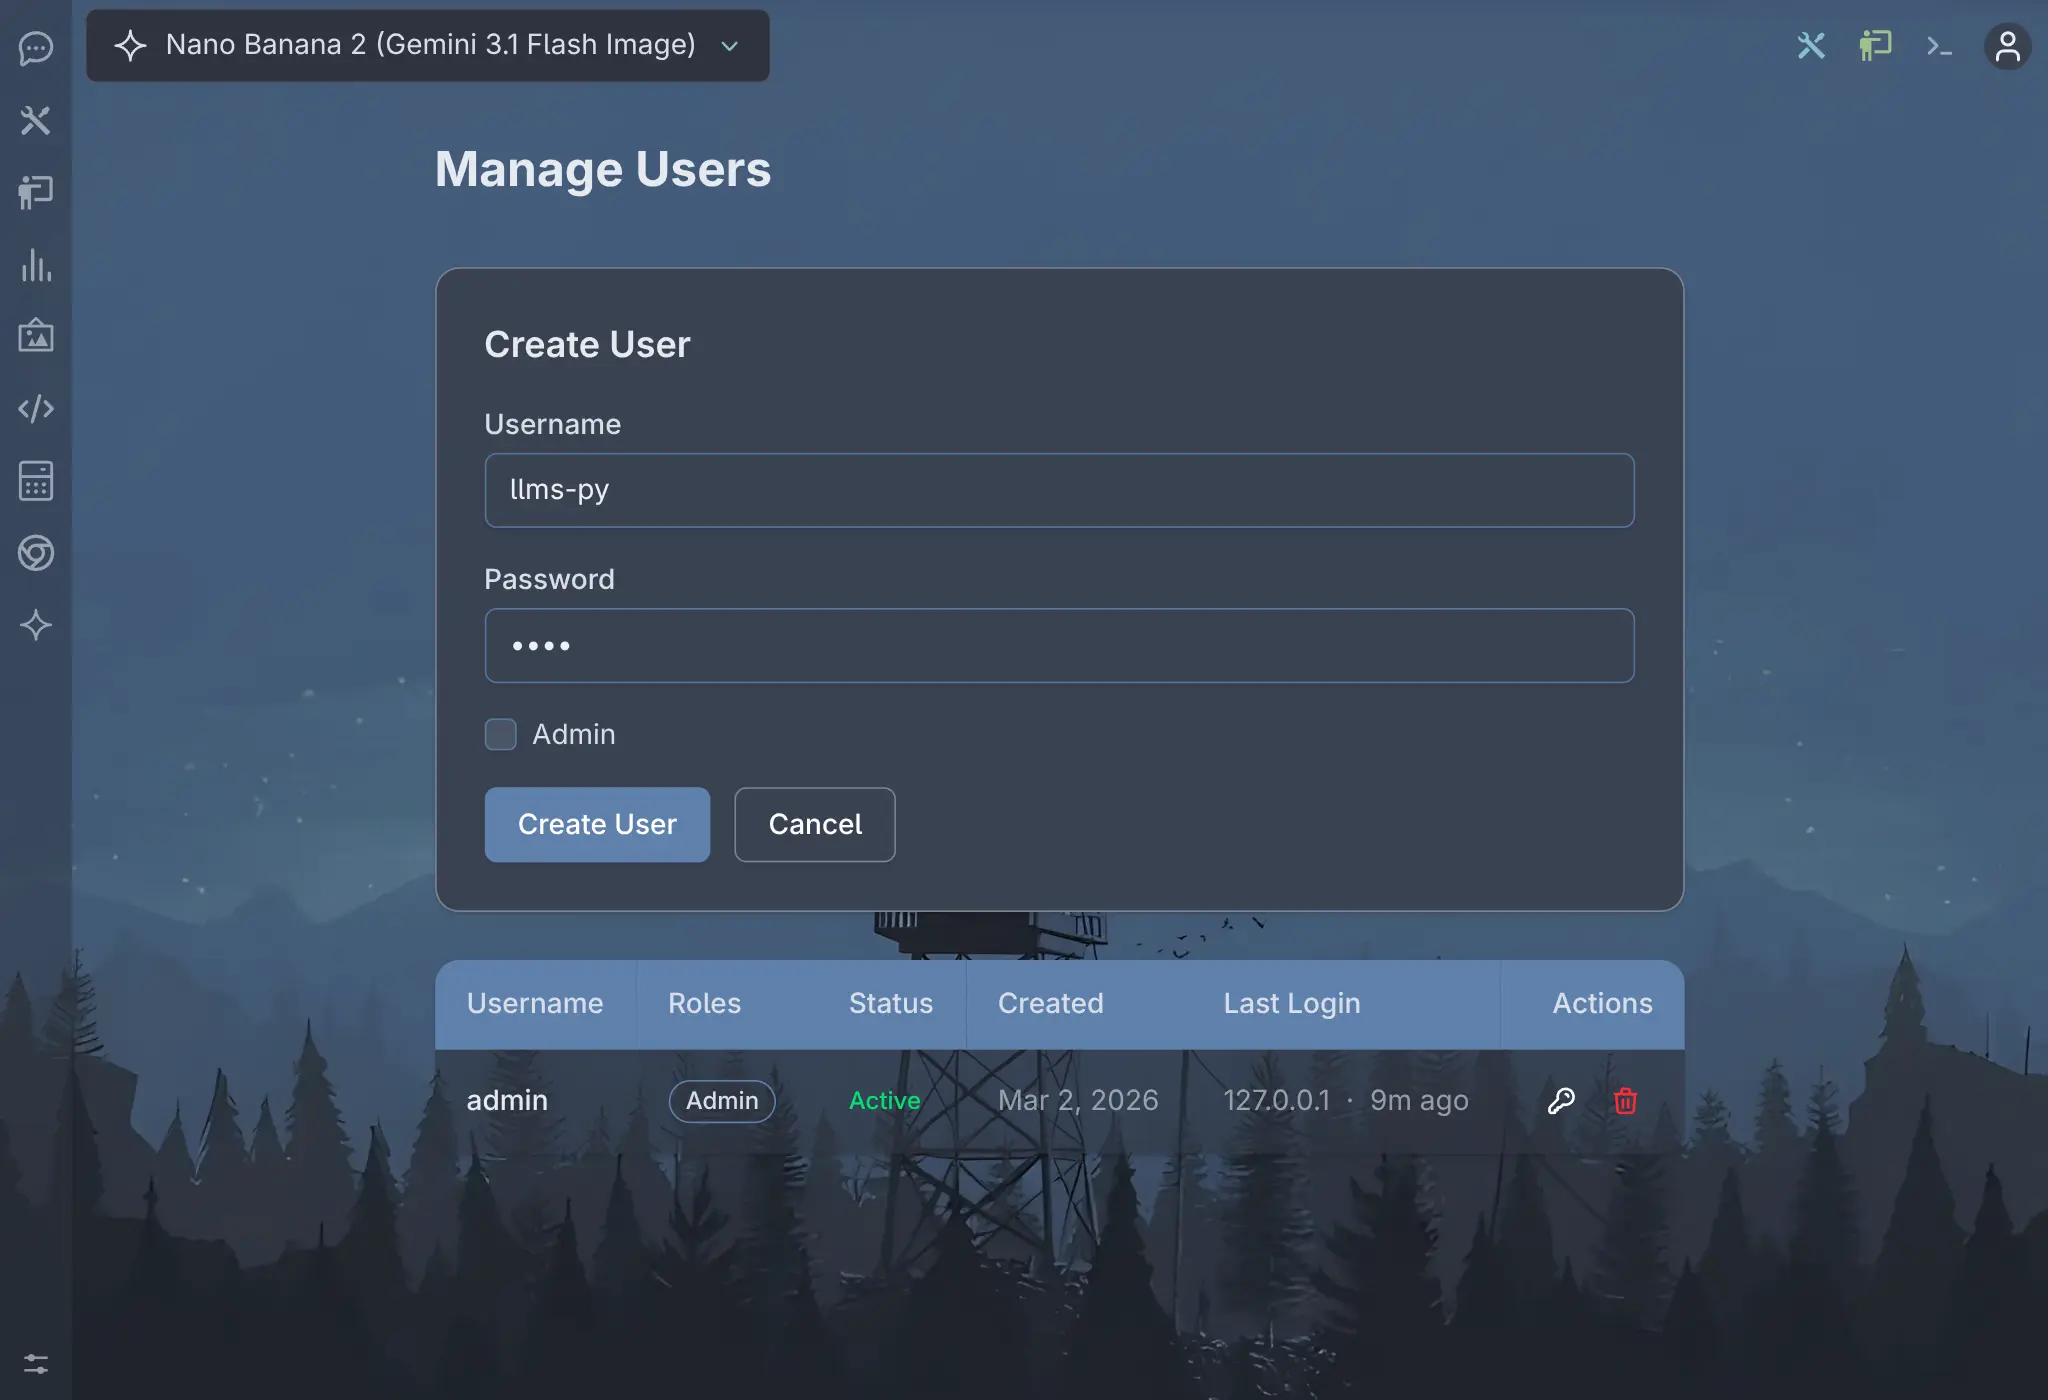
Create User
Click to view full size
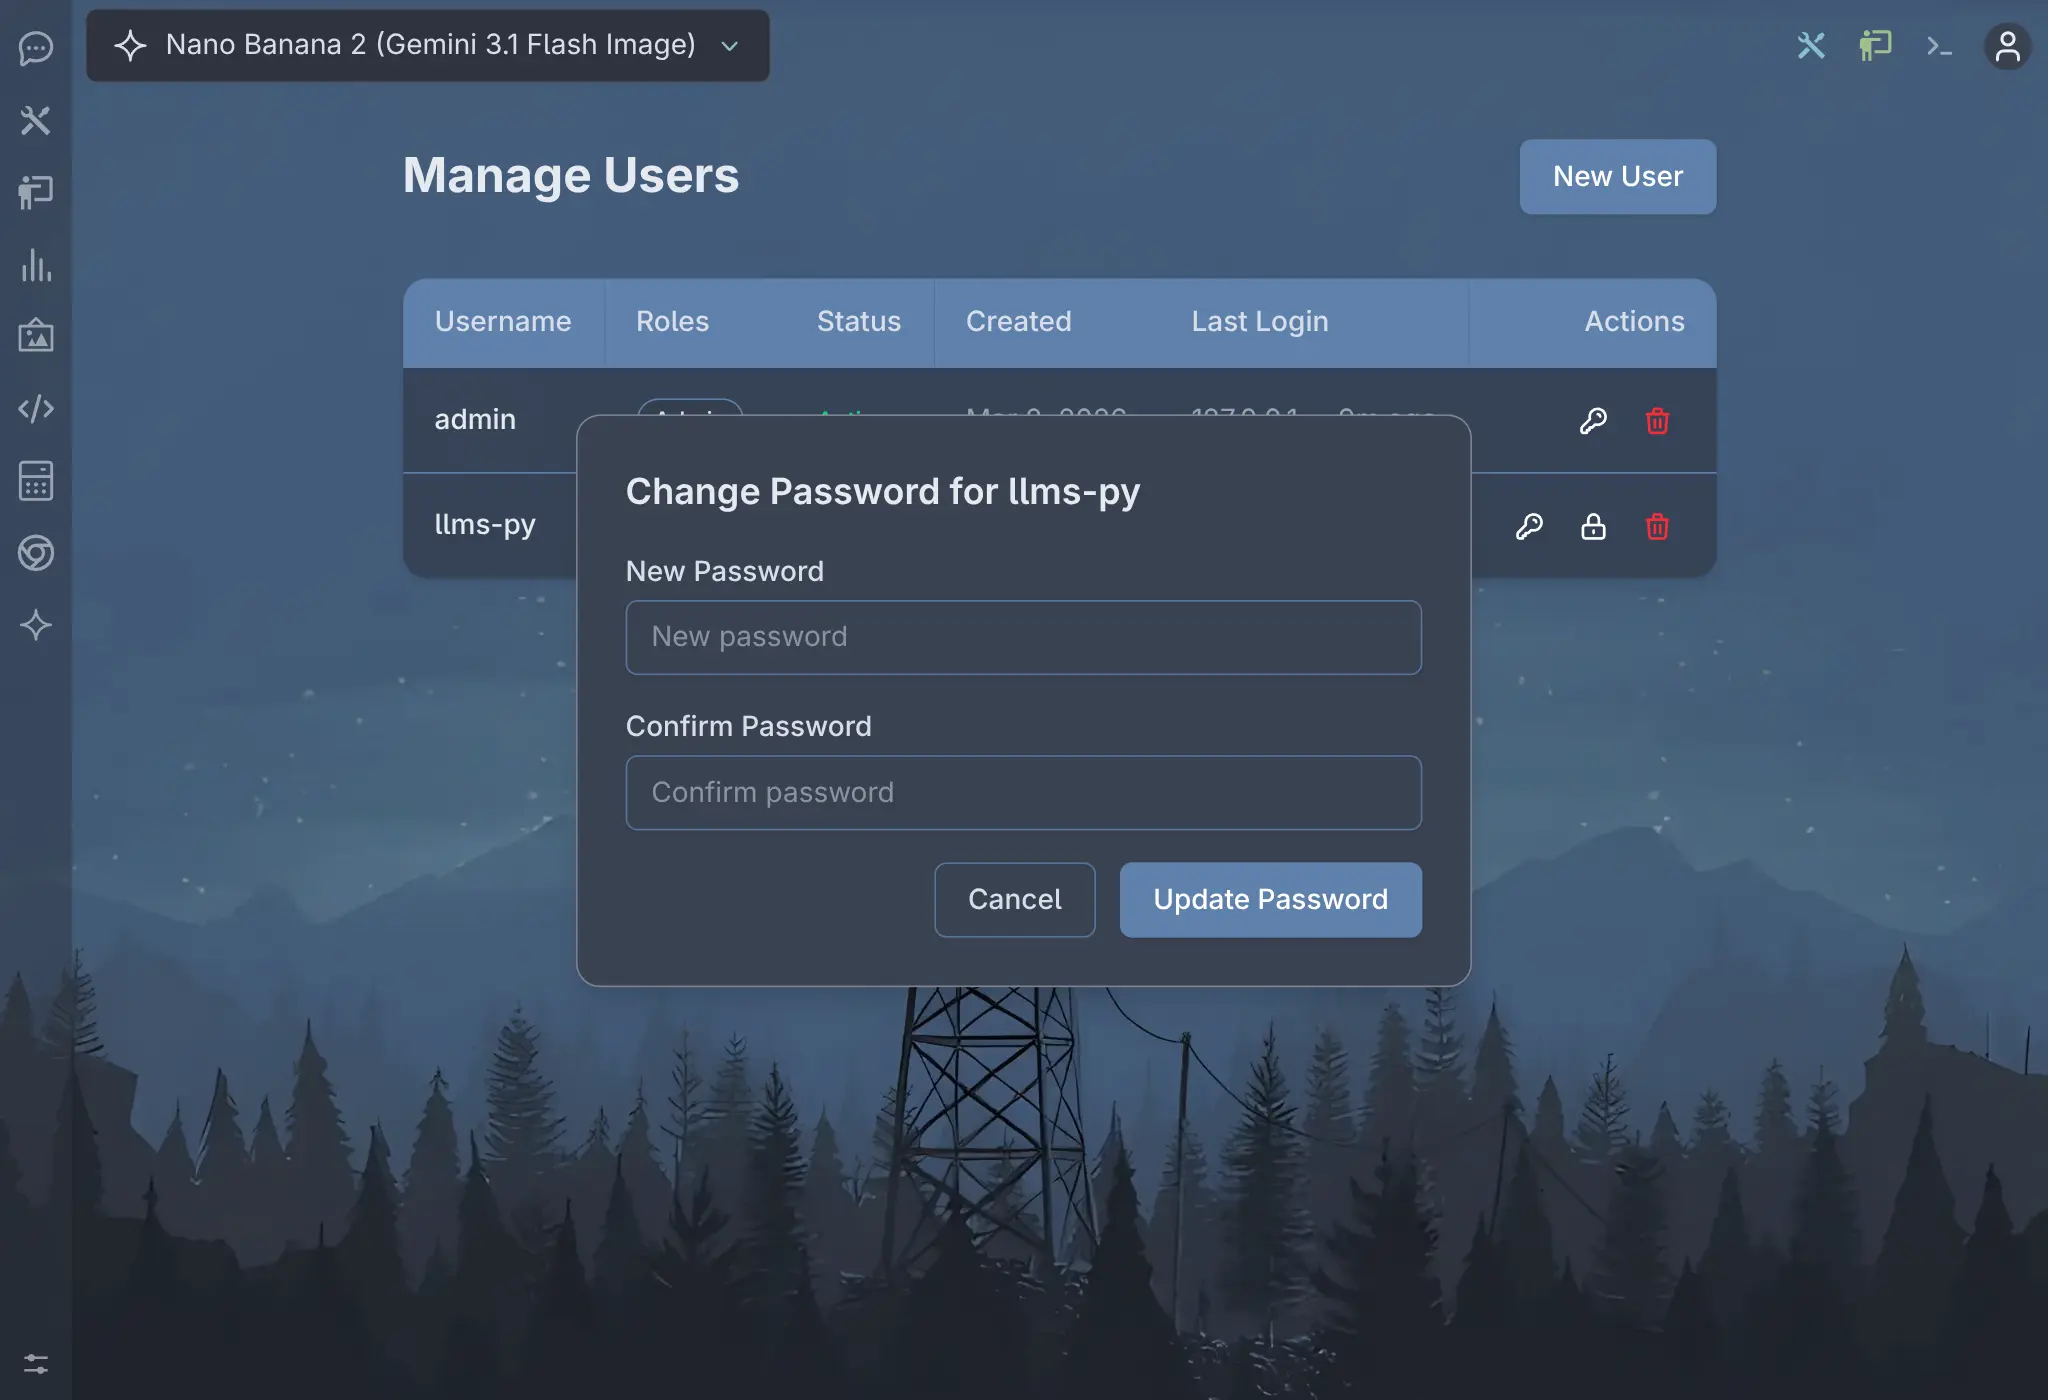
Change Password
Click to view full size

Lock User
Click to view full size
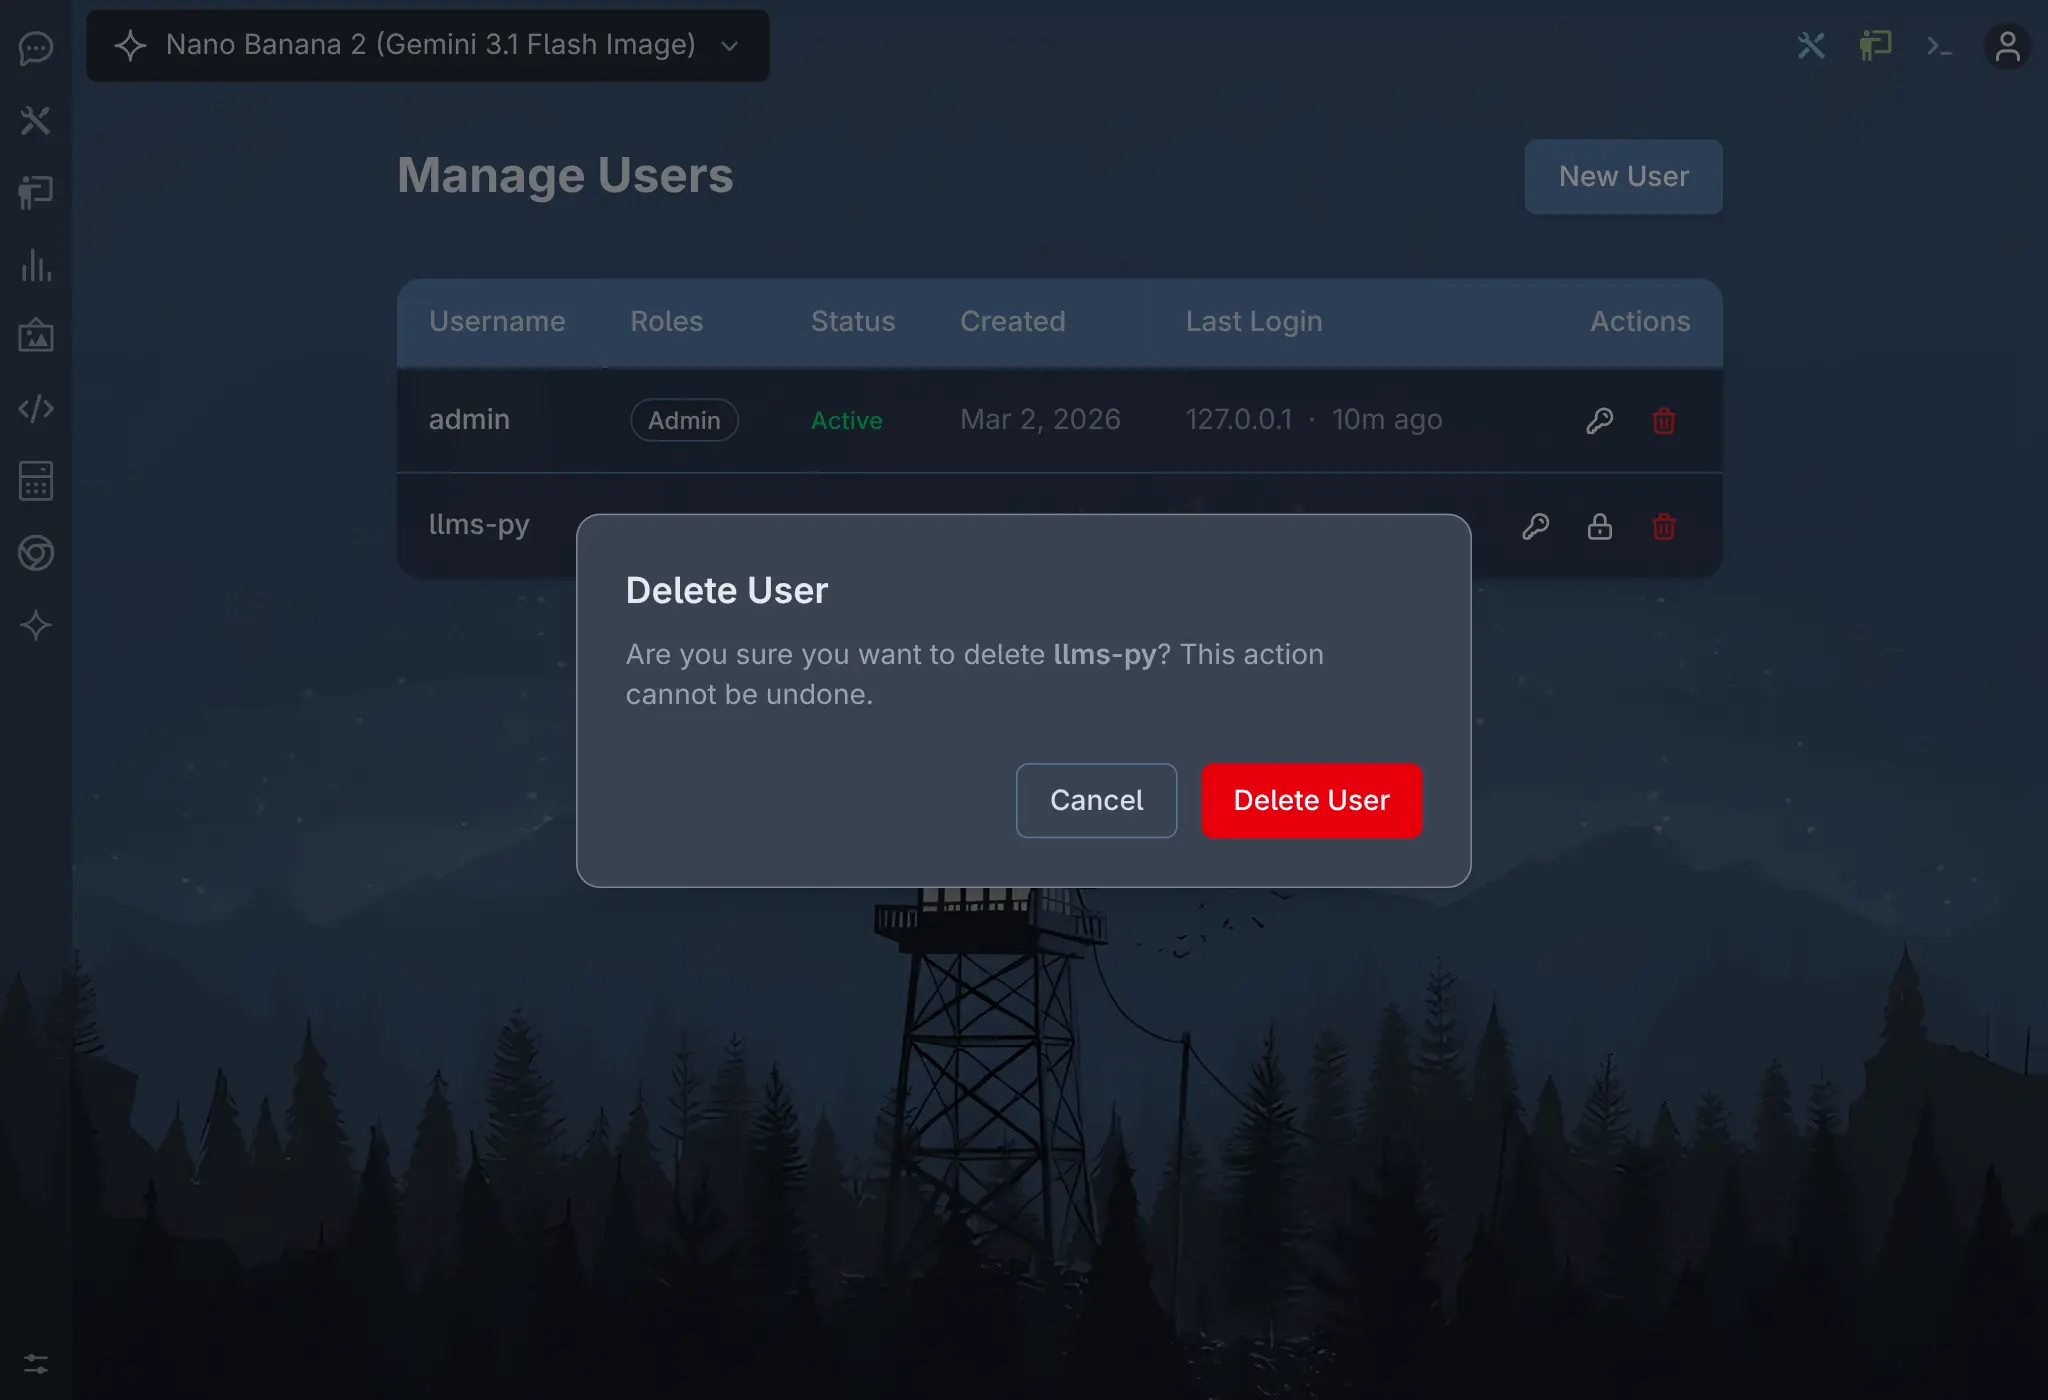
Delete User
Click to view full size
My Account
Accessible at /account for all authenticated users. Shows your profile
information (avatar, username, roles) and provides a Change Password button
that requires your current password for verification.
Users can also change their avatar by clicking on their profile picture and uploading a new image:
After uploading, the new avatar is displayed across the app, including the user menu and My Account page:
CLI Commands
All commands operate on the user store at ~/.llms/credentials/users.json.
--adduser USERNAME
Create a new user or update an existing user's password. Prompts for password with confirmation.
# Create a regular user
llms --adduser alice

# Create an admin (the username "admin" auto-assigns the Admin role)
llms --adduser admin
--removeuser USERNAME
Delete a user and invalidate all their active sessions.
llms --removeuser alice--listusers
List all users with their creation date and lock status.
llms --listusers
#   admin  (created: 2025-03-15 10:30:00)
#   alice  (created: 2025-03-15 11:00:00)
#   bob    (created: 2025-03-16 09:15:00)  LOCKED: Account suspended
--lockuser [USERNAME]
Lock a user account, preventing them from signing in. All active sessions are immediately invalidated. Prompts for a lock reason (defaults to "Account suspended").
# Lock a specific user
llms --lockuser bob

# List users with lock status (omit username)
llms --lockuser
--unlockuser USERNAME
Restore access for a locked user account.
llms --unlockuser bobHow To
Set up authentication for the first time
# 1. Create an admin user
llms --adduser admin
# Enter and confirm password

# 2. Start the server
llms

# 3. Sign in at the web UI, then use Manage Users to create more accounts
Create multiple users from the CLI
llms --adduser admin
llms --adduser alice
llms --adduser bob
Reset a user's password from the CLI
Re-running --adduser with an existing username updates their password:
llms --adduser alice
# "User 'alice' already exists. Updating password."
# Enter new password
Reset a user's password from the UI
Sign in as an Admin, go to Manage Users (/admin), and click the key icon
next to the user to open the Change Password dialog.
Temporarily disable a user
# Lock the account
llms --lockuser bob
# Reason: "On vacation until March"

# Later, restore access
llms --unlockuser bob
Or from the UI: go to Manage Users, click the lock icon next to the user, and confirm.
Change your own password
Sign in, click your avatar, select My Account, and click Change Password. You'll need to enter your current password first.
Switch to a different auth provider
# Use GitHub OAuth instead
llms --auth github_auth

# Or disable auth entirely
llms --auth none
Password Storage
Passwords are never stored in plain text. Each password is hashed using SHA-256 with a unique random salt:
- A 16-byte random salt is generated via
secrets.token_hex(16) - The salt is prepended to the password and the combination is SHA-256 hashed
- The result is stored as
salt:hex_digestin thepassword_hashfield ofusers.json
Verification re-hashes the provided password with the stored salt and compares the result against the stored digest.
Session Details
- Sessions are stored in memory and persisted to
~/.llms/credentials/sessions/ - Sessions expire after 30 days
- Sessions survive server restarts (loaded from disk on startup)
- The session token is stored in an HTTP-only cookie (
llms-token) - Locking or deleting a user immediately invalidates all their sessions